Wednesday, June 20, 2012

Swapsies!

I regularly haunt the boards of Craftster, an online crafting community, but until recently I hadn't dared sign up for any swaps. I had a really good experience with the Monster Pouch Swap earlier in the year, and so I felt inspired to sign up for some more organised swaps. The first of these was the 4 x 6 Art Swap. A pretty simple concept. You create a piece of two-dimensional art measuring 4" by 6" without knowing who your partner is, then just before the mail-out date you're given the real name and address of your swap partner who you then send just the artwork, no extras. Then you play the waiting game, trying not to scare the mailman when you swoop on the daily delivery. I received this gem in the mail today. I love the vibrancy of the colours, and it's a nice little reminder that without the lows in life we never get to appreciate the highs. It's going on my dresser in my room. I'm super impressed that my partner framed it, I didn't even think of that. 


Sunday, May 13, 2012

Sharpie Tie-Dye

When my fabulous friend, and fellow crafty bod, Becky posted a link on her facebook wall to a tutorial for "Sharpie tie-dye", I HAD to try it. I've never been one from understated, or for that matter, particularly tasteful clothing, and when you combine this with the chance for yet another T shirt reconstruction, I couldn't really turn down this opportunity...
Combining this shirt...
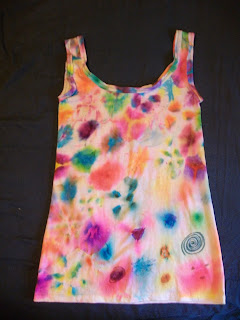
Meh. With an emphasis on the 'eh'
 ...with 
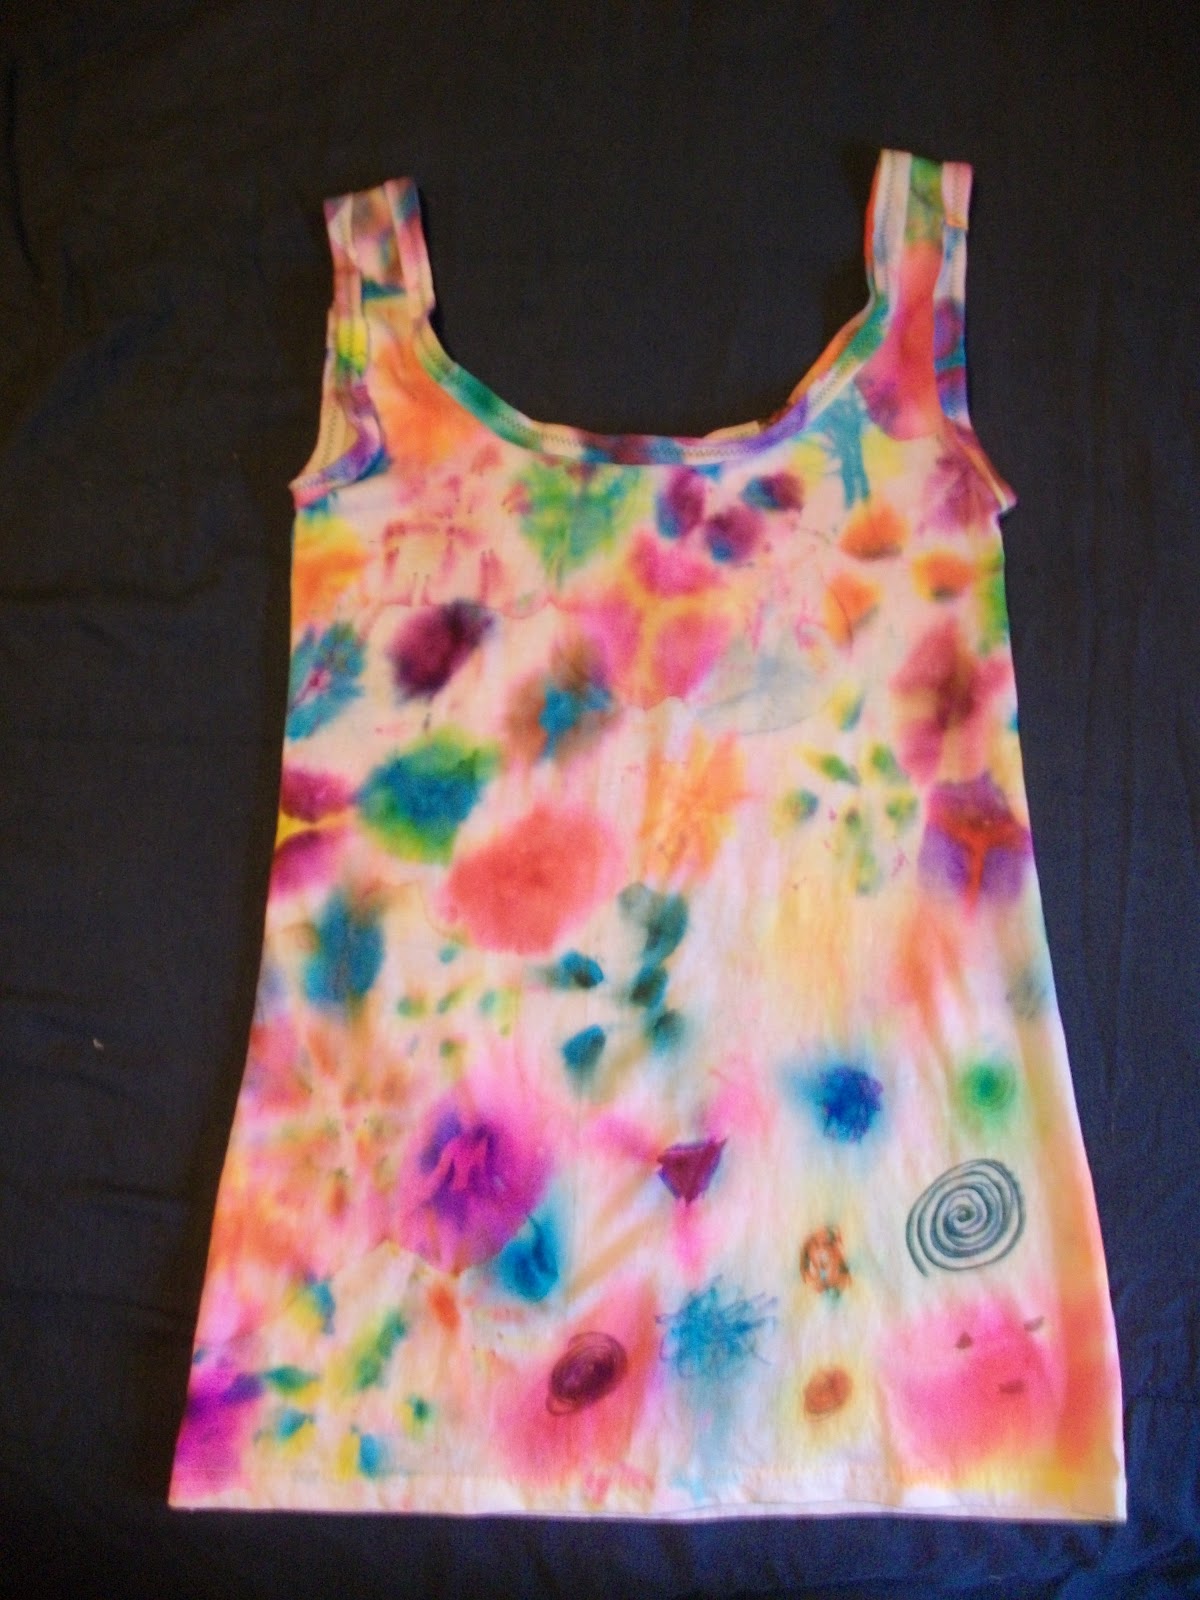
this tutorial and a quick cut-down and re-build resulted in this little beauty...
Cute, non?
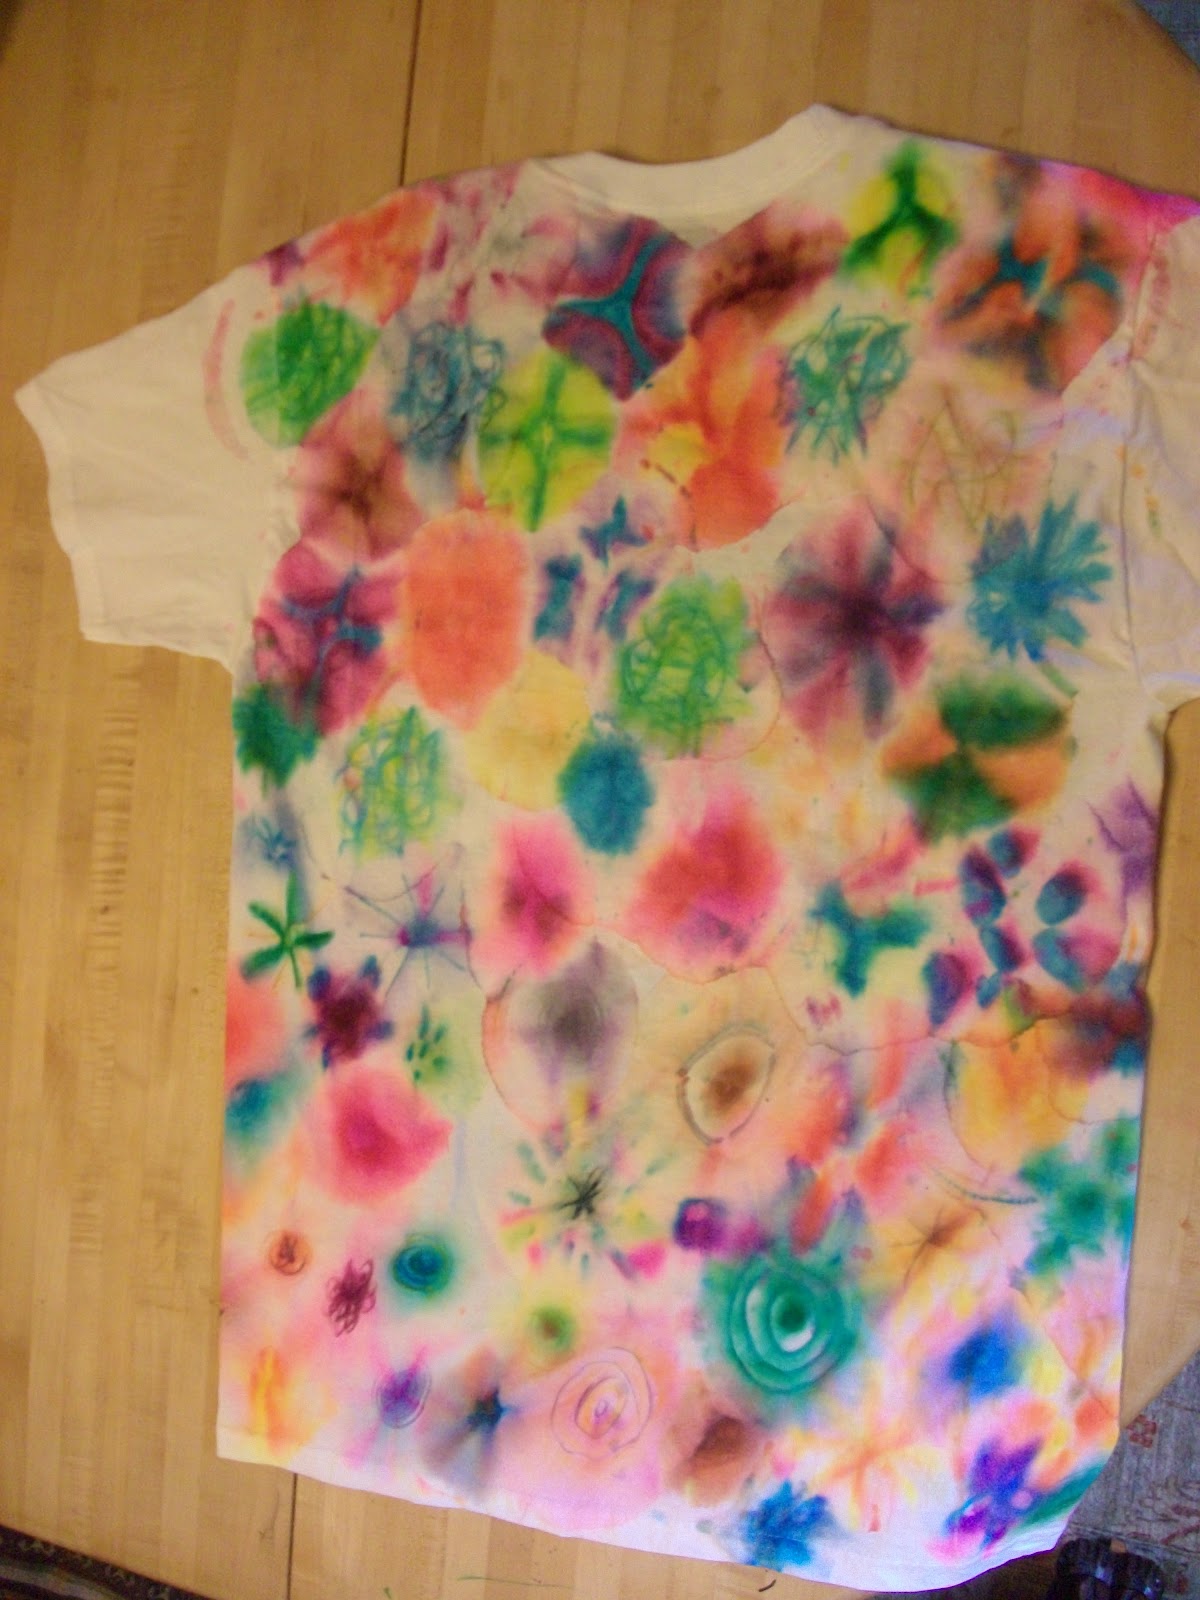
It took me a few days to finish colouring the entire shirt, mostly because I was feeling crumby and the smell of the alcohol and sharpies was giving me a corking headache. I'd guess I probably only spent a couple of hours on it altogether. As for technique, it's wicked simple and my not-quite 5 year old Bear was working on his own shirt with me. You stretch the clean shirt over the top of a plastic cup, holding it on with an elastic band, draw on your design with Sharpies, and then drop rubbing alcohol on to the ink and watch it spread. Anyway, this was the shirt once dying was complete... 

Front


Not the front...

 And now for a quick reconstruction to up the cute factor... I'm a big fan of tank tops, and so clearly this had to become one...

Using a [slightly broken, awaiting repair] cami as a pattern, pin down the side seams and then sew together. 


Once the side seams were taken in, I cut the neckline to the shape I wanted. Instead of rolling the hem or anything else fancy, I used the off-cuts of the shirt to create binding to finish the edges. I won't call it bias binding, because it's not cut on the bias. It's 1.5" wide strips, cut as long as the T shirt scraps would allow, folded around the raw edges of the neck and arm holes. The binding itself has raw edges left to fray/roll as they please, but because it's zig-zag stitched to the shirt it's not going anywhere and give enough stretch to make it comfy and wearable.


I'm stoked as to how well it turned out, and definitely will be getting a ton of wear from it this summer, especially as the warm weather seems to have finally made it to Massachusetts...


Thursday, May 3, 2012

Infinity Scarf

Mum sent me a package for my birthday and included two items of clothing. Sadly, while I love the prints, the fit and style of both the trousers and dress really aren't quite me. Nearly, but missing the mark somehow...  But I didn't want to donate them or throw them out, so I put on my thinking cap and came up with a plan. The dress will be cut down to make a maxi skirt (it's a really pretty African-inspired print, but that's a post for another day) when I get time. And a zipper. However the trousers were a really easy conversion. Originally they looked like this...
 To be honest I didn't even try them on before deciding to sacrifice them to the Gods of Craft. The fabric is super flimsy, the waist is elasticated, and when combined with my size 10 bum that's not going to be a great look. Besides, they're a regular inseam and that is NEVER long enough on my 5'10'' frame.
 However, I kind of love the print, even if my photography stinks today. It's raining, I'll blame that.... I'd seen a couple of tutorials online to make infinity scarves from flannel pyjamas, so the transformation became obvious. I started to do things the hard way; unpicking the seams, then when I realised that was a waste of energy I cut off the waistband with my rotary cutter (or, Current Favourite Toy) and carefully cutting off the pockets and crotch seam, before I figured out that in order for things to line up properly I needed two simple tubes with no fancy schmancy shape, so with the aid of my trusty cutter I lopped the tops off to create to tubes with straight edges. Putting one tube inside the other right sides together I pinned and then stitched around the top to create one long tube. I unpicked the hem at the cuff to make the scarf a teensy bit longer but that was probably an unnecessary step, then pinned and stitched this too, remembering to leave a gap of about 2 inches to turn the scarf right-side out. Once it's right side out, carefully stitch the hole closed (which probably means, don't use bright green thread on black and gold fabric like I did, it looks a little silly...) Et voila, one infinity scarf made by my own fair hands...
 The fabric is 100% viscose; I usually hate the feel of synthetics but it's incredibly soft and lightweight. I can see myself getting tons of wear out of this in the summer.
As for the creation on the dress form, that's an unfinished project for another day...

Monsters!

A good friend from camp, and a huge influence on how I'd like to live my life, has a daughter who turned 2 in March. For her birthday, baby J had The Most Amazing Cake Ever. So of course, never one to see an idea I didn't want to steal, I blatantly ripped off the idea for my own birthday cake. I don't own piping bags, so I couldn't make the buttercream monster hair as fine as I would have liked since the ziploc baggies I used kept exploding if I used only a small hole in the corner. I attempted cake pops for the eyeballs but they kept falling apart and nearly made me crazy, so I opted for marshmallows and chocolate chips instead, and I don't like fondant so instead of making a fondant mouth with teeth which would have looked better, I just went with more chocolate chips. Because I can never have enough chocolate. His insides are three layers of basic sponge, two of chocolate and one of vanilla, sandwiched together with more buttercream. Sadly I didn't get any in-progress shots, but here he is in all his glory.
Please excuse the mess, Cyril ate my maid. *cough*
 I called him Cyril. Cyril is delicious... 

Sunday, March 18, 2012

Simples!


So, some time last year, probably around Halloween, my little brother asked me to make him a meerkat costume. Obviously, being the Greatest Big Sister Ever, I agreed. I wanted a bit of a challenge, and it seemed like something I could actually achieve without getting completely frustrated and giving up. This is that time at which I should point out that my baby brother is 21 years old, in his third year of university where he's studying Agri-Business, and is a 6'5'' 210lb rugby player... Jo-Ann fabrics conveniently had fleece at half-off, so 5 yards of tie-dye khaki coloured fleece later I ended up with this...


It took me a long time to actually figure out how to engineer something so large. I originally thought I would combine tutorials for a hoodie and harem pants, and just tack on a tail somehow. But I realised I wanted it to have as few seams as possible so there are fewer parts to destroy. Then I had what alcoholics refer to as a moment of clarity. It occurred to me that I have footsie pyjamas in my closet that I could use as a pattern, only making it considerably wider and dropping the crotch to somewhere knee-height. I free-handed the sleeves, hood and tail, using a hoodie I own to figure out what kind of shapes I needed. Not for the tail, obviously. Sadly I don't have a tail...


I'm really proud of myself for the sleeves. This is the first time I've added sleeves to a garment since my final GCSE piece when I was 16, and that went... poorly. This time I might have cracked it. Both sleeves are pretty much identical, and I didn't have to unpick a single stitch. The tail is also set in like a sleeve. The best bit though is the back. To achieve authentic meerkatty colours, I spray painted the fleece. And myself. I tried to use my fabric paints, but the colours I have were just too... girly. So I raided the basement and found super-duper industrial strength black spray paint that my viking uses for painting model rockets. 


Sadly it was only after packing it up and mailing it to my bro in the UK that I realised just how poop these pictures are. However, it was shipped with explicit instructions that action shots were required... I'll update if he ever comes up with the goods. It's just so much fun to run around in, I will definitely be making myself a dinosaur costume in this way. And one for Bear, too, so that we can terrorise the library and snack on books together. Now I just need Jo-Anns to have some suitably awesome coupons so I can make it without bankrupting myself...

Simples...

Saturday, February 18, 2012

Rawrosaurus!

My other half is my rawr. He may be my Viking, but we have entire conversations in Dinosaur. It's possible I am more fluent in Dinosaur than I am in English. So given my recent obsession with making plushies, it was obvious I needed to make a Rawrosaurus for valentine's day.
Supplies...
I've been waiting for a good use for the stamp.

Exo-skeleton! Kinda...

RAWROSAURUS!

I am ferocious! And sideways...
Everything came from my stash. The green fabric was a remnant left over from making Bear's SuperWhy costume, as did the yellow fabric which was once upon a time a t shirt. My Viking made the stamp for me when we were working at camp. The buttons came from my ever expanding bag of buttons, and the stuffing is fabric scraps and fiberfill.

Knit, purl, knit, purl, knit, BEAR get off my yarn!

I accidentally discovered knitting over the holidays. I didn't mean to. In fact I actively resisted it for a long time. But in the end, much like the common cold, no matter how great a resistance you put up, it get's you. I say discovered, but really it's more of a rediscovery since I attempted knitting with my gran when I was about 10. As I recall, I managed about 8 inches of stockinette before totally losing interest, and there ended another hobby... But I bought myself some needles (pretty blue ones!) and raided the weird yarns box that lives in the basement....
I must confess this wasn't my first attempt. That ended up looking somewhat sieve-like, and since it was using beautiful soft yarn which I really wanted not to waste, I unwound it so I could reuse the yarn in something wearable.
I'm super happy with how this turned out. There is one wrong stitch where I knitted and should have purled, but I didn't want to undo it so it remains as is... And I have a ton more of this yarn, so I might make something for myself too... I might try and make it without the Bear helping me though, knitting is somewhat difficult with a four year old sat on the yarn.

Wednesday, January 11, 2012

Baking... It's science for hungry people!

And not in the very precise, measured exactly sense. More in the throw things in a pot, mix it up, bake it and hope for the best trial-and-error sense. Today I have been mixing up some deliciousness in the shape of cookies. Seven dozen of 'em. I would have made more, but I ran out of places to put them. And yes, some are stashed in my tummy. :) I may also have been bitten by the Star Wars bug (my viking will be so proud) having watched all the movies in the last 24 hours...
Cookies Mk I - Chocolate Chip and Rebel Cookies

  • 1/2 cup softened butter
  • 1 egg
  • 1 tsp vanilla extract
  • 1/4 cup brown sugar
  • 1/2 cup white sugar
  • 1 1/2 cups AP flour
  • pinch salt
  • 1/4 tsp baking soda
  • 1 1/4 cups semisweet chocolate chips
  1. Cream butter and sugars.
  2. Sift flour, baking soda and salt together. Set aside.
  3. Add egg and vanilla to buttery mixture. 
  4. Spoon flour into butter, mixing until combined.
  5. Add chocolate chips and mix until just blended.
  6. Spoon onto cookie ungreased cookie sheets.
  7. Bake at 350 F for 7-10 minutes, until the edges turn slightly golden brown.
  8. Allow to cool on cookie sheets for a couple of minutes, then transfer to cooling racks. 
  9. Skip dinner and go straight to cookies. 
If you prefer a little more Empire and little less rebel alliance in your cookies, use 1 1/4 cups AP and 1/4 cup cocoa. 
If like me you can't decide which side of the Force to be on, and want a little light in the dark, sub half of the chocolate chips for mini marshmallows (weirdly, they work best if the packet has been left open a little too long and the marshmallows are almost unappetisingly dry.) 
I like mine with a large mug of tea, a most civilised approach to snacking...